[Actually, I’ve been wondering about this for a while, but the volume of the L Tom on the 60’s Detroit Pop kit hardly gets any lower even at a velocity of 0, and it’s bothering me.]
If you are using the paid version of Kontakt, you can adjust the volume of specific samples using the mapping editor, so we would like to inform you of this.
Just to be on the safe side, please make a backup by duplicating the original NKI file (DrumTree.nki, etc.; it may contain a version number).
[Preparation]

Next, press the spanner button in the top left of the screen to enter the edit screen.
Press the “Group Editor” button and find and select the desired group.
You can confirm this by playing on a MIDI keyboard or similar as the group will light up. (In this case, it would be 01-l-a and 01-l-b.)
The round robin function will cause the two groups to sound alternately, so first select one of them, in this case group a.
Next, press the “Mapping Editor” button to open the screen, which will look like this.
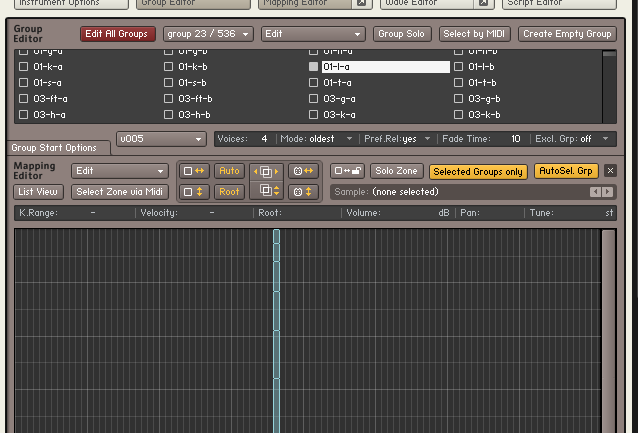
Next, we will propose three different solutions. Some of them are a little complicated, but please try them according to your needs.
[Method 1]
This is the simplest method.
Select the zone you want to change the volume for (in this case, the bottom zone).
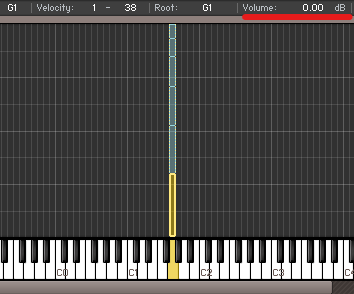
The Volume: field is currently set to 0.00db, but you can change this to a negative value of your liking. (The key is to not lower it too much.)
If round robin is enabled, the sound will alternate with the adjacent group that has not been changed, so you can adjust it while comparing them. (You can also make a small sound by clicking on the top edge of the keyboard picture directly below)
Press the “ESC” key or the spanner mark again to return to the original screen.
Save nki to keep your changes.
[Method 2] Divide the zone
In Method 1, you lower the volume of an entire zone with a wide velocity range, so it may be difficult to adjust the optimum value. Therefore, in Method 2, we will introduce a way to divide zones.
Although it is a bit time consuming, the method is to first duplicate the zones you want to divide and rearrange them.
Select the zone you want to divide as in Method 1, and execute “Duplicate zone(s)” from the Edit button menu just to the right of the words “Mapping Editor” (or from the menu that appears when you right-click on the zone).
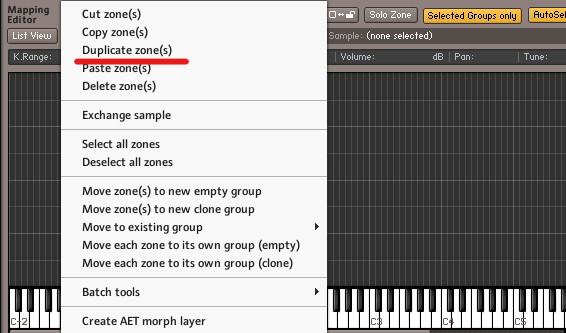
A new zone referencing the same sample will then be generated, overlapping the original zone.
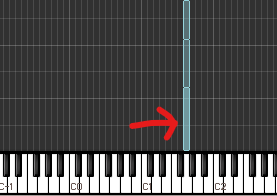
The zone color is a little darker because they overlap.
Set the velocity range of two overlapping zones: one from 1 to X, and the other from X+1 to the top of the original.
(For example, if the original zone’s velocity range is 1 to 29, set the first zone’s velocity range to 1 to 14 and the second zone’s velocity range to 15 to 29.)
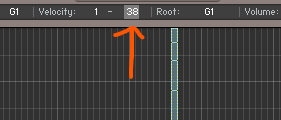
To change the velocity range, select the Zone and drag its edges, or enter values into the lines at the top of the Mapping Editor.
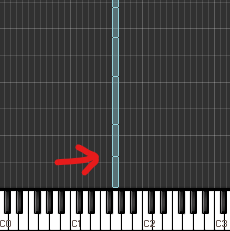
We were able to separate the zones by duplicating them and resizing each one into a lower and upper half.
Please be careful that the velocity areas do not overlap and that there are no gaps.
The two refer to the same sample.
By doing this, you can adjust the volume of only the lower row or each by specifying a minus value in the menu “Volume:” at the top of the Mapping Editor, as in method 1.
If round robin is enabled, the sound will alternate with the neighboring group that has not been changed, so you can make adjustments while comparing.
(You can also make the sounds quieter by clicking the top edge of the keyboard image just below.)
The key is to not turn it down too much.
As with method 1,
when you have decided on a good volume, change it in the same way for the other group that has not been changed (01-l-b, for example), and you’re done.
Press the “ESC” key or the spanner mark again to return to the original screen.
Save nki to keep your changes.
[Method 3] Fade
In Method 2, we increased the number of velocity steps by dividing the zone (duplicating, shrinking and arranging them side by side), but in the above example, velocities 1 and 14 still sound the same.
Therefore, in Method 3, we propose a way to use Kontakt’s functions to give you more complete volume control.
The process is the same as Method 2, from selecting the zone you want to divide and executing Duplicate zone(s) to duplicating it.

Up to this point, it is the same as method 2.
It is important not to divide it in half this time, but to keep it layered.
However,
lower the upper velocity value of only one of the overlapping zones by one.
(Example: Velocity range 1-29 and velocity range 1-28 overlap)
Please note that both zones are selected immediately after duplicating. Click somewhere unrelated to deselect them, then click again to select them again.
Then set the Volume setting of the newly shortened zone to the minimum volume required.
Again, the key is to not overdo it, so it’s best to keep it within a practical range, but you may want to set it to a larger number to experiment and check the effect.
Then, drag the mouse across the two duplicated and overlapping zones to select both zones.
Once this is done, go to the “Edit” menu again and this time select “Batch tools” → “Auto-apply x-fades (velocity)“.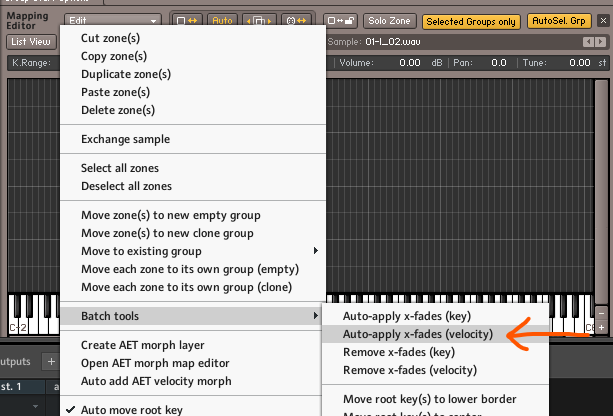
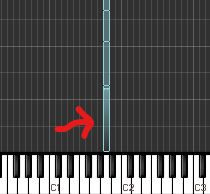
When executed, each zone will be in a velocity crossfade state (the appearance of each zone will also have a slight gradation), and you can see how the volume changes seamlessly from the bottom end of the velocity range to the top end.
If you want to start over, select both zones again and click “Remove x-fades (velocity)” to return the zones to their original gradient mode.
when you have determined a good volume, make the same change to the other group that you have not changed (such as 01-l-b), and you’re done. (Of course, this is not necessary for groups without round robin.)
Press the “ESC” key or the spanner mark again to return to the original screen.
Save nki to keep your changes.
That’s it.
For further details on the Mapping Editor, please refer to the Kontakt manual.
*Reference: The crossfade function of the Mapping Editor is explained in an easy-to-understand manner here (adsrsounds.com Kontakt tutorial).
In closing
All of PREMIER SOUND FACTORY’s products are produced with the utmost care, to preserve the sound as it was when it was played in its best condition, just as if it were a precious historical painting, and to reproduce the sound without losing even a single drop of its brilliance.
We believe that the result of such commitment is one of the reasons why our customers say that our products are of high quality and high quality sound.
Based on the same consideration, we intentionally recorded the unevenness and variation of the instruments and performers (top professionals) as pointed out, without correcting them as much as possible.
Especially in the digital realm, “sound” loses its freshness and becomes thinner the more you touch it. Even the methods we introduced today can contribute to some degree (sometimes significantly, we believe) to the deterioration.
However, ease of use for customers is also very important, so we think it would be a joy for the product to be customized to your ideas, with the above points in mind.
We hope that this article will be of use to you.
PREMIER SOUND FACTORY Support.
